
Chichi Dango has an interesting history, it’s origins are from Hiroshima, Japan, yet no one in Japan knows about it, but everyone in Hawai’i loves it! The family that started Nisshodo Candy Store in Honolulu, Hawai’i brought the recipe to Hawai’i 100 years ago, because of their shop, Chichi Dango has become popular all over Hawai’i (watch this cool documentary about Nishodo Candy Store here). It differs from traditional mochi since it has milk powder or coconut milk in the recipe, giving it a slightly different texture & flavor. Chichi Dango is most popular on Girl’s and Boy’s Day, customers line up to buy Chichi Dango by the pound. It’s often brought to parties, family gatherings and potlucks.
If you’re in Honolulu, be sure to visit Nisshodo Candy Store (1095 Dillingham Blvd Bldg I-5 Honolulu, HI 96817)
Ingredients for Nisshodo Candy Store Chichi Dango. 


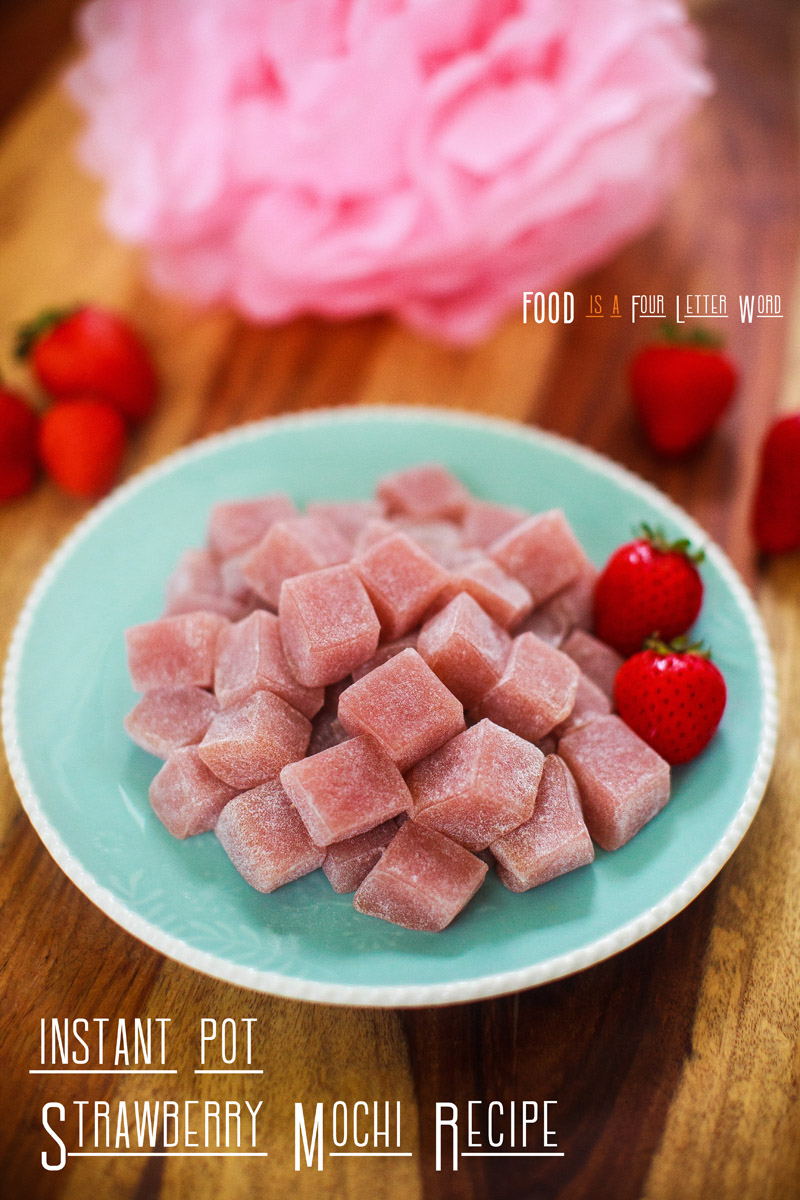
You can cut up the ChiChi Dango Mochi into small pieces and enjoy it with ice cream

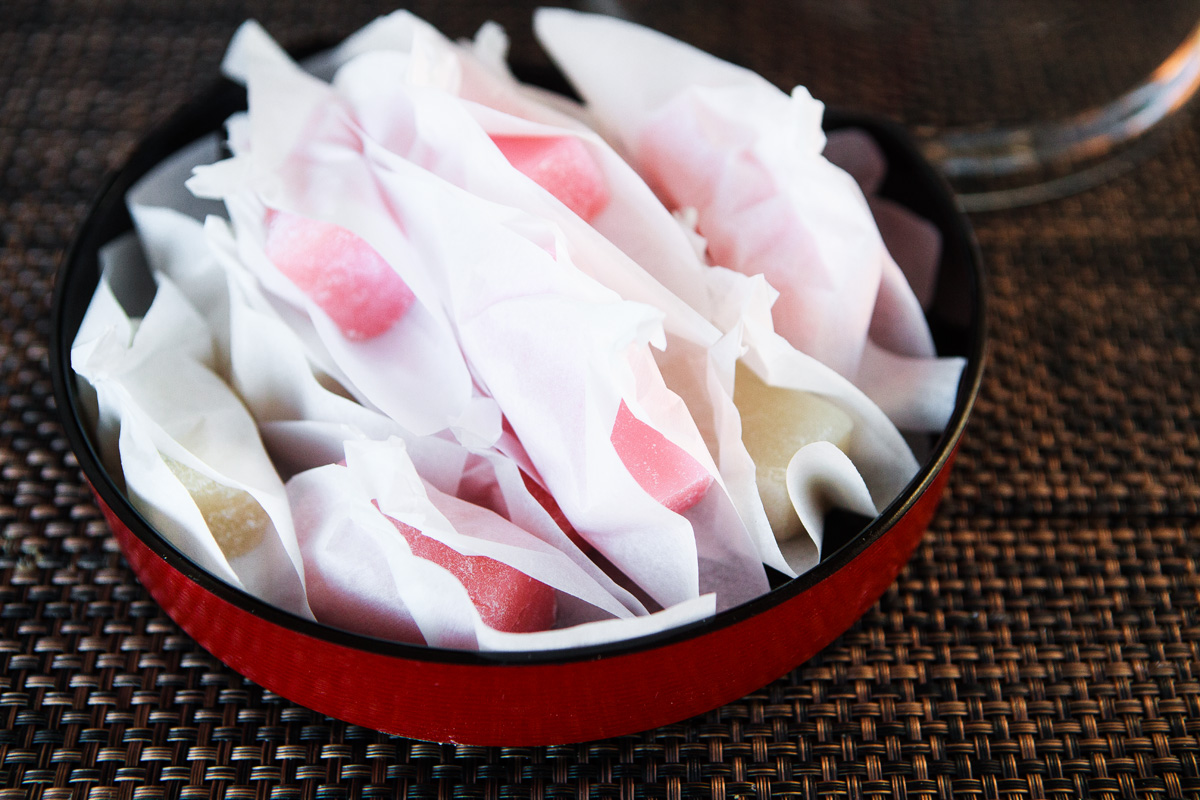
You can wrap the ChiChi Dango pieces in parchment squares for gift giving like Nishodo Candy Store, fold the parchment diagonally, then twist the top. The parchment is not for sealing, it’s to keep the pieces separated. 


9 Comments
Christine
January 30, 2021 at 9:52 am
So I just tried this recipe using the Instant Pot method. When I took out the pan and removed the foil I noticed that the top was still watery or not set. Should I put it back in to cook more or just let it cool for the 2-3 hours as recommended?
Van
January 30, 2021 at 10:45 am
Hi Christine, if it’s watery – put it back in and cook for another 10 minutes High Pressure with 10 min NPR
Lyann
March 6, 2021 at 9:57 am
I love Nisshido chichi dango! I just made both in the instant pot and oven. The texture in the oven was a little softer than the one in the instant pot. Both had good flavor, the oven one was little sweeter? My question, both felt like they were done when I touched the top, but they both had moisture on the top. I took my paper towel and pressed it on top to absorb the moisture. I kept the one in the oven in for 67 min. But I was afraid if I kept baking, it would get tough. If I would’ve just let them cool with the wetness on top, would it eventually soak in and be dry on top? When you make it, is it completely dry when done? I’m going to try it again once I hear your response. This is a great alternate when you can’t have the real deal! Thank you for sharing!
Van
March 7, 2021 at 8:13 pm
Hi Lyann, sometimes when I make it there’s a little bit of liquid on top, you can just pour it out or dab it like you did. Nothing beats Nisshodo Candy Store, but I’m thousands of miles away & this is fun to make until I can visit Honolulu again 🙂
Eileen
March 8, 2021 at 5:58 pm
Hello! I tried the Nishido style in my oven. After 1 hour it had a watery layer on the top so I baked for another 15 minutes. Then another 15 minutes. It was still watery so I dumped out the watery part (by then only a few spoonfuls) and bumped up the temperature to 325. It’s still not set and going on it’s 4th 15 minute extension. (So far total bake time almost 2 hours!) Is the initial temperature of 275 correct? Or a typo?
If this doesn’t work then I’ll definitely look for a pan to fit my pressure cooker (NOT an insta-pot brand).
Van
March 9, 2021 at 8:06 am
Hi Eileen, let’s try to figure out why it didn’t set. Did you use Mochiko? Do you have an oven thermometer to check if the oven temp is accurate? Are you using a metal or glass pan? Next time if there’s a little liquid on top, take off the foil, increase temp to 300°F and bake for a few more minutes, but it should not have to cook for 2 hours.
Eileen
March 11, 2021 at 5:22 pm
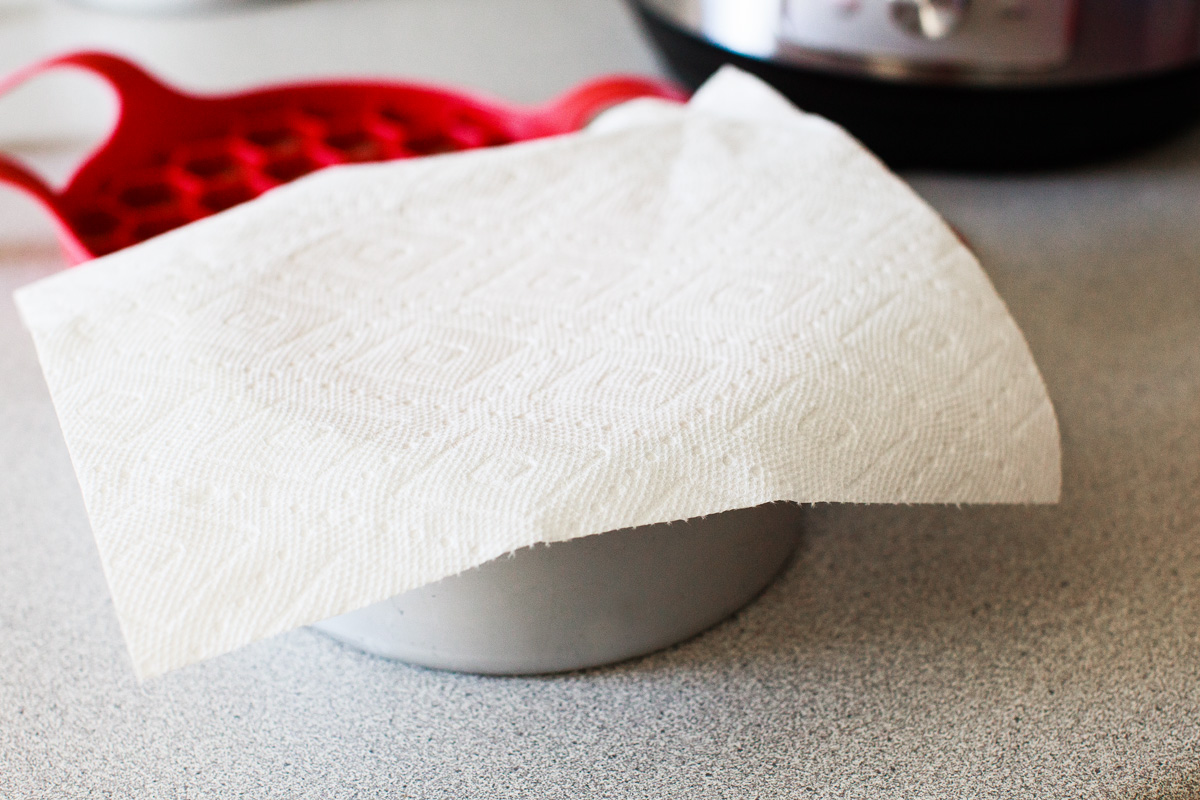
Yep! Used mochiko flour. I used my ninja XL air fry oven (like a toaster oven but bigger) and a metal pan. I don’t have an oven thermometer but maybe I’ll try use my regular oven next time!! I saw the other comment AFTER I wrote mine about dabbing the wetness. One thing I DIDN’T do was put a paper towel over the pan while baking! I just assumed that was only for instant pot!! You think that would’ve made a difference? It still came out yummy (except little bit hard around the edges!!
Thanks!!
Jenny
May 23, 2022 at 11:57 pm
I used a round glass Pyrex about 7” wide. After it partially cooled I found that it was not as firm or gummy and wet at the top like the others noted. I put it back in the instapot for another 10 minutes. The results were sticky and soft; not at all as chewy as I had hoped. I’m wondering if the pyrex preventer the heat from penetrating through. Any assistance or thoughts are appreciated.
Van
May 24, 2022 at 12:01 am
Hi Jenny, using glass does make a difference – glass isn’t a good heat conductor, so that’s most likely why it was still soft. You can still try cooking it longer until it’s the correct texture.