Instant Pot Creamy Lemon Cheesecake Recipe

March 20, 2020Van
Blog post

Prep time: 15 minutes

Cook time: 40 minutes

Serves: 8

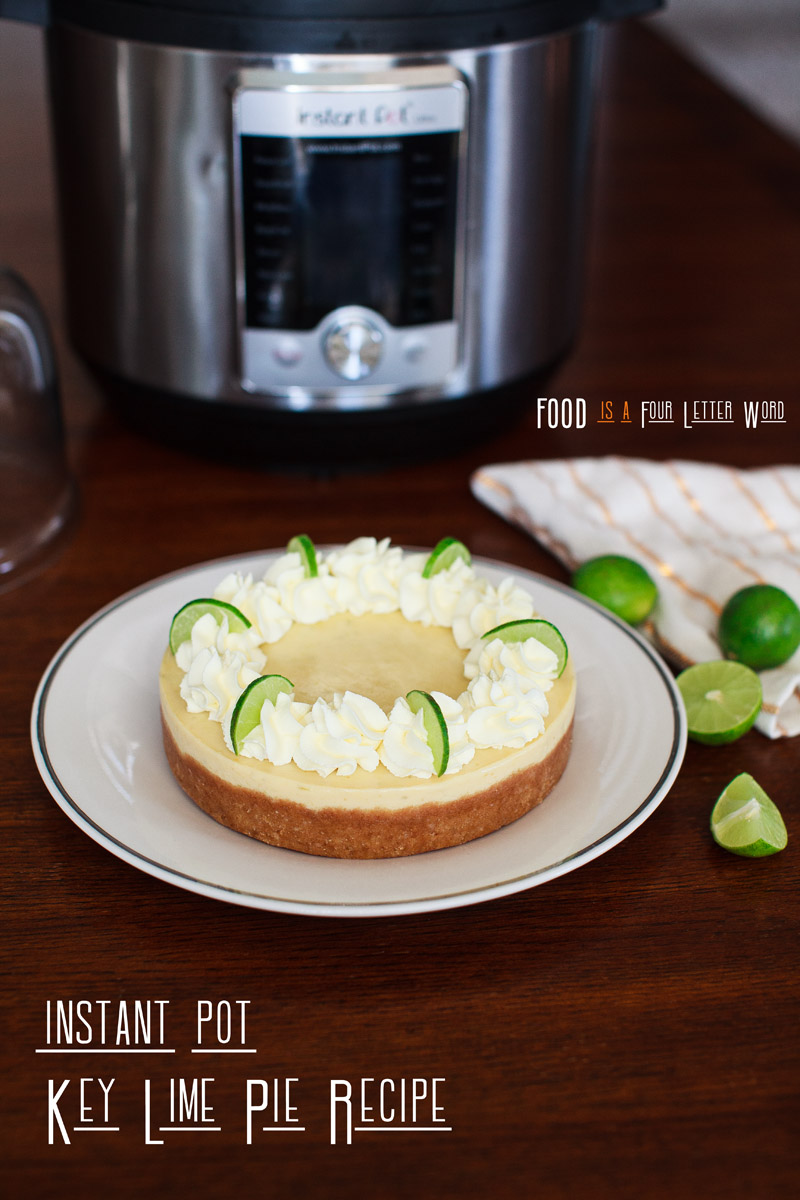
Lemon is one of my favorite flavors for cheesecake, it’s tangy, slightly sweet and has the most luscious texture. Fresh lemon juice + lemon zest gives this cheesecake the brightest & intense lemon flavor – use a microplane to get ultra fine, delicate zest . The Instant Pot cooks it nice and evenly, creating the best texture for cheesecake, thick, smooth and creamy. Top with homemade whipped cream, garnish with some lemon slices and this treat will surely brighten up anyone’s day!

Instant Pot Peanut Butter Cheesecake Recipe with Nutter Butter Crust

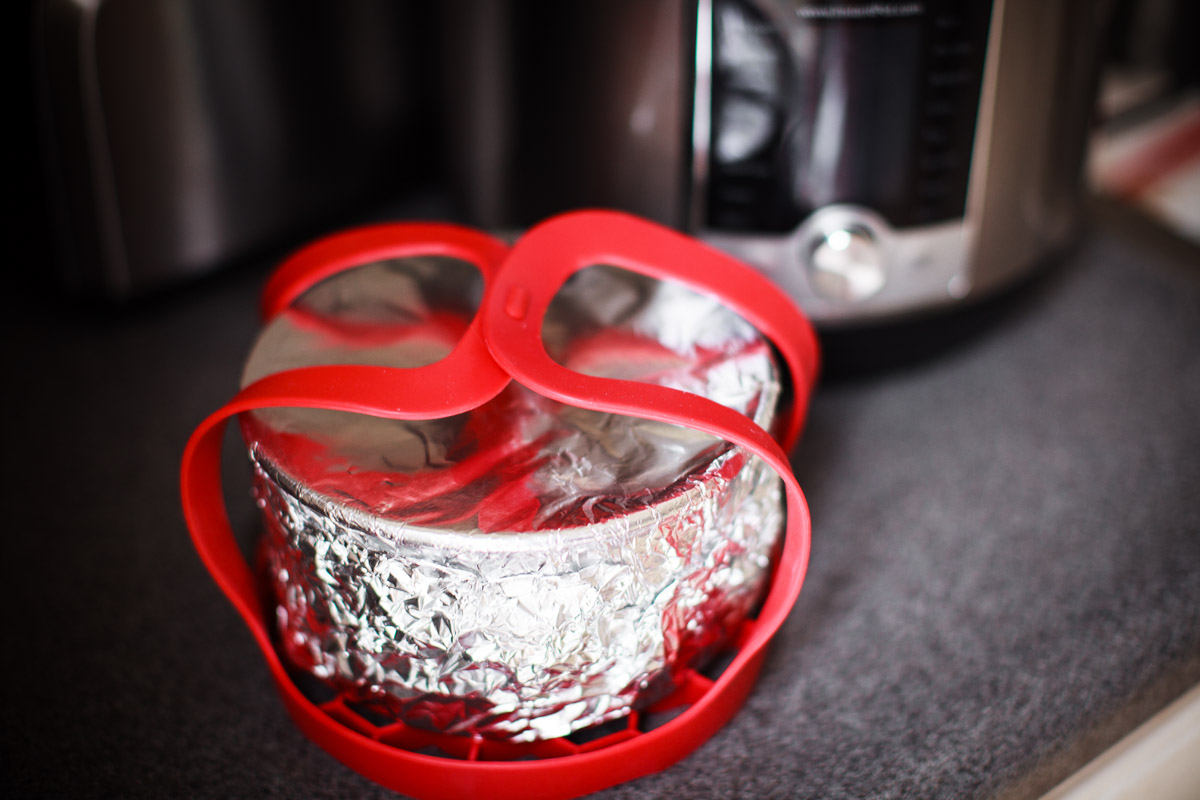
Using a silicone sling makes it easier to load and lift the cheesecake out of the Instant Pot (purchase one here) Be sure to wrap the top & bottom of the pan with foil. This helps keep the top of the cheesecake flat and the crust crisp
Instant Pot Peanut Butter Cheesecake Recipe with Nutter Butter Crust

Instant Pot Creamy Lemon Cheesecake Recipe

Instant Pot Creamy Lemon Cheesecake Recipe

Instant Pot Creamy Lemon Cheesecake Recipe

Instant Pot Creamy Lemon Cheesecake Recipe

Instant Pot Creamy Lemon Cheesecake Recipe

Be sure to click on the accessories list below to get the most out of your Instant Pot.
Best Instant Pot Accessories List

Print Recipe

Instant Pot Creamy Lemon Cheesecake Recipe

  • Prep time: 15 minutes
  • Cook time: 40 minutes
  • Serves: 8

www.foodisafourletterword.com

Ingredients

  • 16 oz Cream Cheese, (2 blocks)
  • ¼ Cup + 1 Tablespoon Lemon Juice
  • Zest from 3 Lemons, about 2 Teaspoons
  • 14 oz Can of Sweetened Condensed Milk
  • 3 Tablespoons Heavy Cream
  • 3 Tablespoons Cornstarch
  • 2 Large Eggs
  • 7 inch non-stick Springform Pan

CRUST

  • 1 Cup Graham Cracker Crumbs
  • 2 Tablespoons Granulated Sugar
  • 4 Tablespoons Salted Butter

Method

  • 1)

    Fill a large bowl with hot tap water from your sink, place the 2 Large Eggs into the bowl and set aside to get them to room temp (only takes a few minutes). Cut the cream cheese into small blocks, place it into a microwave safe bowl. Heat the cream cheese for 15 seconds, take it out, give it a stir than microwave for another 10 seconds then stir and check again – continue with 10 second increments until it’s very soft, almost melted.

  • 2)

    Mix ¼ Cup+1 Tablespoon of Lemon Juice with 3 Tablespoons Cornstarch – make sure there are no lumps and add to the bowl of cream cheese. Add 14oz Sweetened Condensed Milk, 3 Tablespoons Heavy Cream, Lemon Zest and hand stir with a whisk or use the paddle attachment on a stand mixer (slowest setting) until it’s smooth and there are no lumps. Add 2 Large Eggs. Stir until the eggs are completely incorporated and the batter is smooth & homogeneous.

  • 3)

    Trace the bottom of your 7 inch pan on parchment paper and cut out the circle to line the bottom of the pan. You do not need to line the sides with parchment, use butter to grease the the interior side of the pan very well. This makes it easier to release the cheesecake from the pan & prevents cracking. Add 1 Cup Graham Cracker Crumbs, 2 Tablespoons Granulated Sugar and 4 Tablespoons of melted Salted Butter into a bowl and mix well. Pour the crumbs into your springform pan and press firmly onto the bottom, you can use a spoon or something with a flat bottom like a small ramekin to help even out the crust.

  • 4)

    Pour the batter into your cheesecake pan. Pick up the pan and tap it a few times on the counter, then use a spoon or fork to even out the batter and pop any bubbles. Place a paper towel on top of the pan, it should not touch the cheesecake. Place one piece of foil on top and seal tightly,  then another piece of foil the bottom that wraps up towards the top ~ the entire pan should be covered ~ this helps prevent steam getting on your cheesecake. The cooking time for this recipe is also designed for this wrapping technique (your cheesecake could turn out overcooked if you’re not wrapping the top and bottom)

  • 5)

    Place 1½ Cups of water into the Instant Pot and place the trivet into it. Carefully place the the cheesecake pan on top of the trivet or use an Instant Pot Silicone Sling – (purchase here) If you have a separate sealing ring you use for desserts, place that one on the lid.  Seal the lid and switch the knob to “Sealing”.  Set the Instant Pot for High Pressure / Manual for 40 minutes. Once the timer is up and you hear the beep, wait an additional 15 minutes before switching the knob to “Vent”, when the pin drops open your lid.

  • 6)

    Carefully remove the cheesecake from the Instant Pot. Unwrap the foil, the pan will still be hot so use mitts or kitchen tongs.  Leave it on the counter to cool for about 1.5 hours. Cover the pan and place it into the refrigerator for at least 12 hours before serving.  Keep the cheesecake in the baking pan, you don’t want to remove the cheesecake until it’s been cooled and dab off condensation with a paper towel. Top with Cool Whip or homemade whipped cream (recipe here). Enjoy!

↓ Supplies to make this recipe ↓


2 Comments

  • Rosa

    July 8, 2022 at 10:23 am

    Hi there! Love this recipe and I am excited to try it out. Just wondering if it’s necessary to keep the paper towel on the pan throughout cooking or what is it’s purpose?

    1. Van

      July 8, 2022 at 11:31 am

      Hello, the paper towel absorbs the moisture from the IP and prevents it from falling on top of the cheesecake. It’s not completely necessary so you could skip it, but there might be water spots on top of the cheesecake.

Leave a comment

Your email address will not be published. Required fields are marked *

Previous Recipe Next Recipe