Instant Pot Reese’s Peanut Butter Cheesecake Recipe

February 18, 2020Van
Blog post

Prep time: 20 minutes

Cook time: 45 minutes

Serves: 8

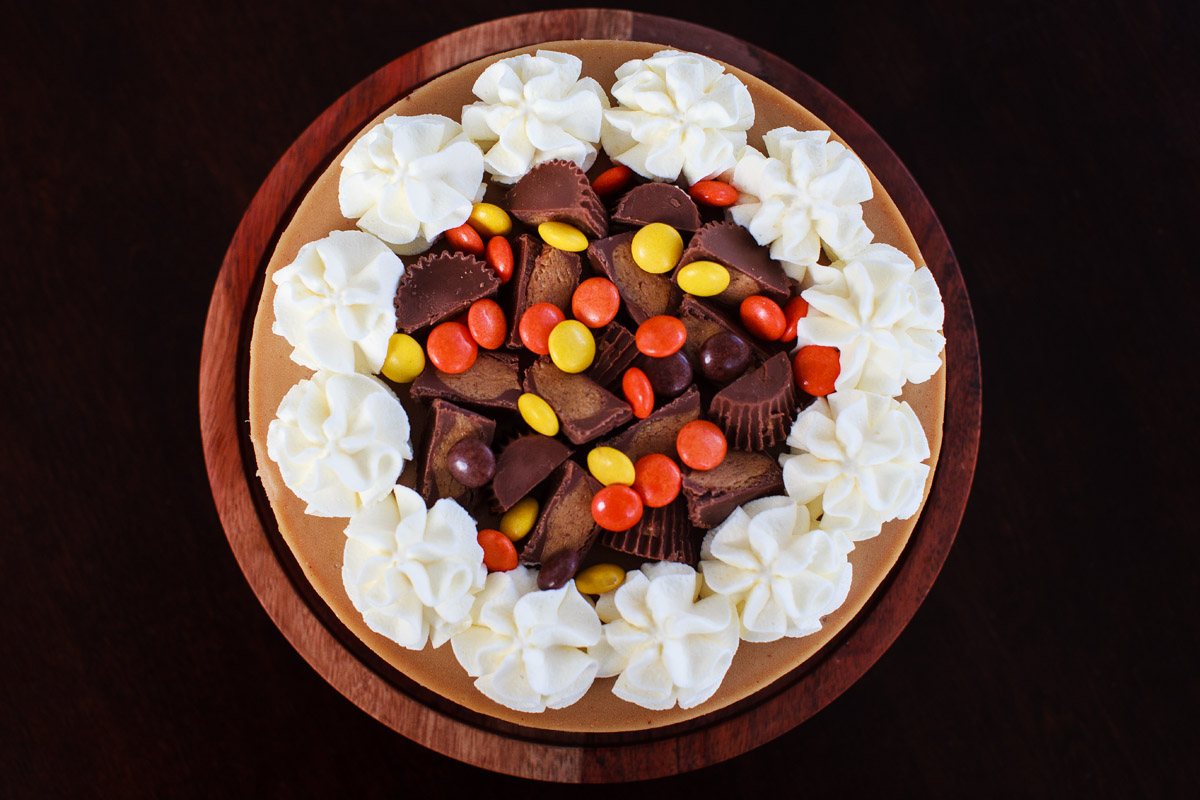
Reese’s is so iconic, you can spot the packaging from a mile away – and I always loved peeling the brown wrappers off of the cups before enjoying one of the greatest flavor combinations of all time: chocolate and peanut butter. The combo is so good that I never outgrew my childhood love of all things Reese’s. Of course as a child of the 80s, E.T. first introduced me to the better version of an M&M—Reese’s Pieces. Those little vintage colored peanut butter & chocolate candies set off a lifelong love of PB&C (peanut butter & chocolate). Make this creamy & delicious cheesecake with me if you’ve always been a fan of Reese’s.

Instant Pot Reese’s Peanut Butter Cheesecake Recipe

Instant Pot Reese’s Peanut Butter Cheesecake Recipe

Instant Pot Reese’s Peanut Butter Cheesecake Recipe

This silicone sling makes is very easy to load and lift out the cheesecake pan (purchase here).
Instant Pot Peanut Butter Cheesecake Recipe with Nutter Butter Crust

If you use your Instant Pot on the counter under your cabinets, this is an awesome accessory that diverts the steam downward and away from your cabinets (purchase here)

Instant Pot Reese’s Peanut Butter Cheesecake Recipe

Instant Pot Reese’s Peanut Butter Cheesecake Recipe

Instant Pot Reese’s Peanut Butter Cheesecake Recipe

Instant Pot Reese’s Peanut Butter Cheesecake Recipe

Instant Pot Reese’s Peanut Butter Cheesecake Recipe

Print Recipe

Instant Pot Reese’s Peanut Butter Cheesecake Recipe

  • Prep time: 20 minutes
  • Cook time: 45 minutes
  • Serves: 8

www.foodisafourletterword.com

Ingredients

  • 16 oz Cream Cheese (2 blocks)
  • ½ Cup Reese’s Peanut Butter or Smooth Peanut Butter
  • 2 Large Eggs
  • ½ Cup Granulated Sugar
  • 1 Tablespoon Cornstarch, sifted
  • ¼ Cup Heavy Cream
  • 20 Mini Reese’s Cups, cut in half (and more for topping)
  • Reese’s Pieces, (optional)
  • 7 inch non-stick Springform Pan

CRUST

  • 1 Cup Chocolate Graham Cracker Crumbs
  • 2 Tablespoons Granulated Sugar
  • 4 Tablespoons Salted Butter

Method

  • 1)

    Fill a large bowl with hot tap water from your sink, place the 2 Large Eggs into the bowl and set aside to get them to room temp (only takes a few minutes). Cut the cream cheese into small blocks, place it into a microwave safe bowl. Heat the cream cheese for 15 seconds, take it out, give it a stir than microwave for another 10 seconds then stir and check again – continue with 10 second increments until it’s very soft, almost melted.

  • 2)

    Trace the bottom of your 7 inch pan on parchment paper and cut out the circle to line the bottom of the pan. You do not need to line the sides with parchment, use a stick of butter, grease the the interior side of the pan very well. This makes it easier to release the cheesecake from the pan & prevents cracking. Add 1 Cup Chocolate Graham Cracker Crumbs, 2 Tablespoons Granulated Sugar and 4 Tablespoons of melted Salted Butter into a bowl and mix well. Pour the crumbs into your springform pan and press firmly onto the bottom, you can use a spoon or something with a flat bottom like a small ramekin to help even out the crust.

  • 3)

    I use a KitchenAid stand mixer with a paddle attachment to mix the batter since it incorporates the least amount of air into the batter – avoid overmixing the cheesecake batter.  Place the 16 Oz of soft cream cheese, ¼ Cup of Heavy Cream, ½ Cup of Peanut Butter, ½ Cup of Granulated Sugar and 1 Tablespoon of sifted Cornstarch into your mixer.  Mix on low speed until it looks smooth and combined. Scrape your bowl half way through with a spatula to ensure an even mixture.  Add the 2 Large room temperature Eggs and mix using the lowest setting until everything is incorporated and looks smooth. While mixing, scrape your bowl 2-3 times with a spatula to ensure an even mixture. Add the 20 chopped Mini Reese’s Cups and fold into the batter with a spatula.

  • 4)

    Pour the batter into your cheesecake pan. Pick up the pan and tap it a few times on the counter to even out the batter and this also helps pop air bubbles in your batter. Place a paper towel on top of the pan, it should not touch the cheesecake. Place one piece of foil on top and seal tightly,  then another piece of foil the bottom that wraps up towards the top ~ the entire pan should be covered ~ this helps prevent steam getting on your cheesecake. The cooking time for this recipe is also designed for this wrapping technique (your cheesecake could turn out overcooked if you’re not wrapping the top and bottom)

  • 5)

    Place 1½ Cups of water into the Instant Pot and place the trivet into it. Carefully place the the cheesecake pan on top of the trivet or use a Silicone Sling – (purchase here). If you have a separate sealing ring you use for desserts, place that one on the lid.  Seal the lid and switch the knob to “Sealing”.   Set the Instant Pot for High Pressure / Manual for 45 minutes. Once the timer is up and you hear the beep, wait 15 minutes, then switch the knob to “Venting” and when the pin drops open your lid. Carefully remove the cheesecake from the Instant Pot. Unwrap the foil, the pan will still be hot so use mitts or kitchen tongs.  Leave it on the counter to cool for about 1.5 hours. Cover the pan and place it into the refrigerator for at least 12 hours.

    ***Different Instant Pot models, living in higher elevation or even different springform pans may change the cook time. If there is no jiggle in the very center, the cheesecake is most likely overcooked (overcooked cheesecakes are eggy and grainy instead of creamy), use 5-10 minutes less cooking time next time. If your cheesecake looks like liquid in the middle, it’s under cooked. Make sure there’s still 1½ Cups of water in the pot, recover the pan and cook for another 5 mins on High Pressure and 5 minute natural pressure release (repeat if necessary).

  • 6)

    Top the cheesecake with homemade Whipped Cream or Cool Whip and garnish with more chopped Reese’s cups and Reese’s Pieces. If you want it more chocolatey, drizzle some chocolate sauce on top. Enjoy!

    (I used a Wilton 1M Open Star Piping Tip to pipe the cream)

↓ Supplies to make this recipe ↓


Leave a comment

Your email address will not be published. Required fields are marked *

Previous Recipe Next Recipe