
Cheesecake is a deceptively simple dessert. There’s nowhere to hide with a plain cheesecake—it’s all about the marriage of flavor and texture. That creamy, rich filling over a deliciously crisp cookie crust is the perfect combination in my book. I’ve had cheesecake all over the U.S. but, most cheesecakes were mediocre! Even the widely accepted kings of the cake like Junior’s and Carnegie Deli in NYC cannot hold a candle to my personal recipe. And I hate to start a bi-coastal cheesecake war here—but the best cheesecake I’ve had in the entire US of A happens to be in Los Angeles at the famous landmark Langer’s Deli (they also have the Best pastrami west of Katz’s Deli).
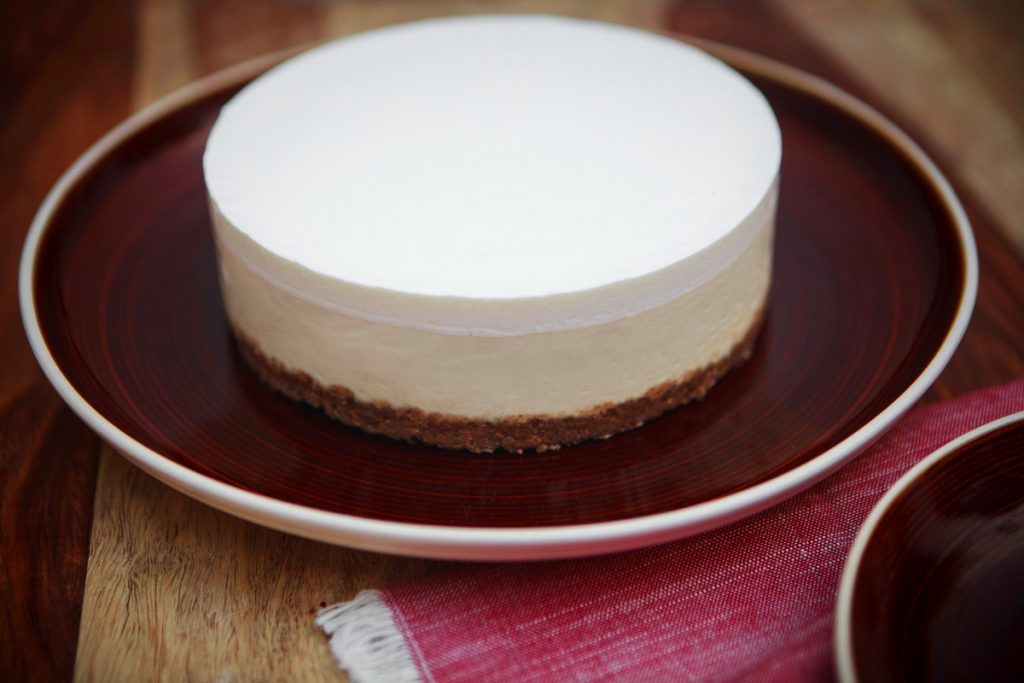
After YEARS of making cheesecake the traditional way at home in my sometimes unforgiving oven I’ve developed this perfect cheesecake recipe inspired by Langer’s—and adapted it for the Instant Pot. It’s thick, creamy and perfectly balanced with subtle flavors of vanilla and citrus I long for in a good slice. I add a sour cream topping to make it extra special, it makes your cheesecake look perfect and the refreshing tang and creaminess from the topping really takes the cheesecake to the next level. It’s the best cheesecake I’ve ever made, the texture turns out perfectly from “baking” it in the Instant Pot. You will impress all your friends and family with this recipe!
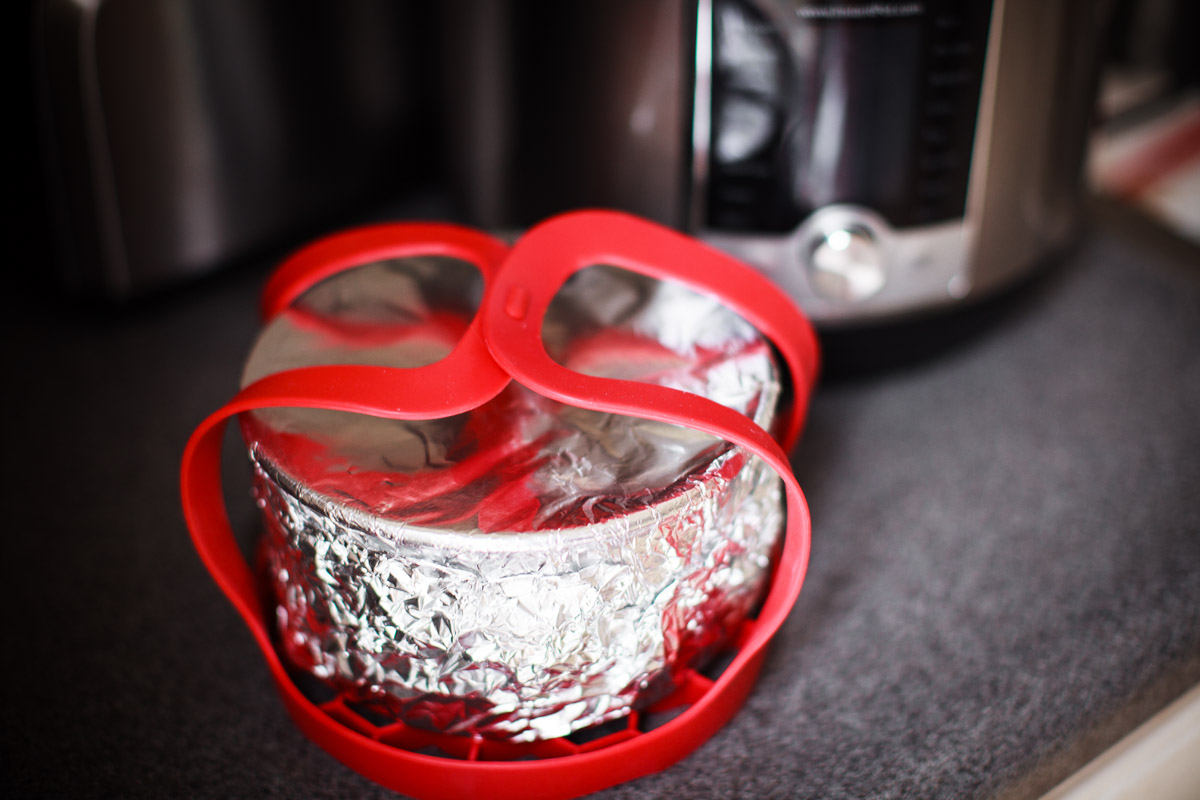
Using a silicone sling makes it easier to load and lift the cheesecake out of the Instant Pot (purchase one here) Be sure to wrap the top & bottom of the pan with foil. This helps keep the top of the cheesecake flat and the crust crisp


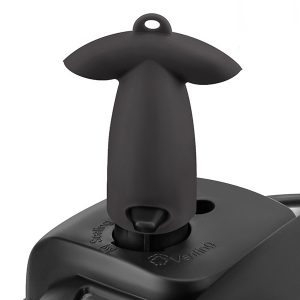
If you use your Instant Pot on the counter under your cabinets, this is an awesome accessory that diverts the steam downward and away from your cabinets (purchase here)
Be sure to click on the accessories list below to get the most out of your Instant Pot.


46 Comments
Linda
February 22, 2018 at 5:08 pm
What beautiful, clear directions! Your cheesecake looks magnificent…can’t wait to try one of my own.
Van
February 22, 2018 at 7:14 pm
Thank you so much Linda, I hope you enjoy the cheesecake!
Rose
February 23, 2018 at 4:58 pm
At what altitude do you live? I am at 7000 ft above sea level and I have to adjust the time for almost every recipe made from a lower altitude. Thank you.
Van
February 23, 2018 at 6:40 pm
Hi Rose, I’m a little under 100 Ft. Do you usually have to add to the cooking times?
Patrice
February 24, 2018 at 8:05 am
Hello. The cheesecake looks so delicious and beautiful!
What size IP did you make it in?
Van
February 24, 2018 at 8:13 am
Thank you Patrice! I used an 8 Qt, but the 7 inch pan will also fit in the 6 Qt – I designed the recipe so it would work with both the 6Qt & 8Qt Instant Pots. The only difference is with the 6Qt, you need to use a foil sling to help you lift the pan out of the pot.
Sharon
February 26, 2018 at 5:58 am
I just made your incredible cheesecake recipe this weekend – hands down my favorite cheesecake! I decided to make my crust with the Speculoos cookies from Trader Joe’s, but used your blind baking method. Now, I would like to move on to a lemon or lime version. How would you suggest the additions without compromising the integrity of the creaminess? Do you have some other versions you would like to share?
Van
February 26, 2018 at 9:12 pm
Hi Sharon, thanks for trying out my recipe & I’m so glad you love it! Speculoos cookies must have made a very delicious crust! You can add 1 Teaspoon of lemon or lime zest, 4 Teaspoons of lemon or lime juice and use 3/4 Cups of Sugar (instead of the 1/2 Cup +2 Tbs) – everything else would be the same. I’m going to post a matcha and chocolate version soon 🙂
Fm
February 27, 2018 at 6:17 pm
I just made this… super delicious! But it’s more like a firm pudding (still holds its shape if sliced). Is it supposed to be like that or did I undercook it…. I made it in a 7 in soufflé dish (looks like a white large ramekin)…. I wonder if I needed to cook it longer?
Van
February 27, 2018 at 8:30 pm
Hello Fm, thanks for trying out the recipe. Did you refrigerate it for 12 hours before trying it? The issue is most likely the ceramic dish, my recipe is made in a metal springform pan. Ceramic isn’t as good as a conductor of heat when compared to a metal pan so it takes longer to absorb heat. I think if you add more cooking time it would be ok, maybe another 5-10 minutes.
Brandy Hatfield
March 2, 2018 at 3:02 pm
Made this today, it’s coming on my counter now. It is 100% necessary for it to be in the fridge for 12 hours?? It smells so good in here, and that’s a long time
Brandy Hatfield
March 2, 2018 at 3:03 pm
*cooling on my counter
Van
March 2, 2018 at 3:05 pm
Hi Brandy! A few people told me that they refrigerated it for 3 hours then put it in the freezer for 30 minutes and they said it was good. 12 hours is best, but go for it if you want it for dessert tonight 😀 Thanks for trying it out!
Nik
March 14, 2018 at 5:40 pm
Is it possible to make this without eggs? If so, would I just omit them entirely or try to find some vegetarian substitute?
Thanks.
Van
March 15, 2018 at 9:43 pm
Hi Nik, I haven’t tried making this without eggs yet so I’m unsure how it would turn out, the eggs acts as a binder so I don’t think it would set properly. I have a No-Bake recipe that you might like if you’re looking for one without eggs: http://foodisafourletterword.com/recipe/no-bake-cheesecake-cups/
Susan
March 19, 2018 at 4:40 am
Your cheesecake looks fabulous, thank you for making the recipe so detailed, I wanted to make one but wasn’t sure quite what technique to use in the Insta pot. Saving this to Pinterest, and going to make it at my next card party. Susan @Craftingafamily.com
Van
March 19, 2018 at 8:44 am
Thanks Susan, I hope you enjoy it when you get a chance to make it! Thanks for giving it a try 😀
Peggy
March 20, 2018 at 6:06 am
Hi, I made this once and it was amazing! Tasted delicious, but I felt it could have cooked a little longer. Wondering if you have the “keep warm” setting on, so that while the pressure is releasing naturally for 20mins, it’s still cooking?
Van
March 20, 2018 at 11:13 am
Hi Peggy, when the timer is up on the Instant Pot, it automatically switches to Keep Warm, so yes it’s still cooking during the 20 minutes of Natural Pressure Release. Did you turn off the Instant Pot when the timer went off?
Barbara
March 20, 2018 at 10:26 am
Can you freeze it for a week or so with sour cream topping or is it best to eliminate topping if freezing for that long?
Van
March 20, 2018 at 11:19 am
Hi Barbara, if you plan on feeezing it, I would eliminate the sour cream topping. You can add it later when you’re defrosting it.
SusieW
March 29, 2018 at 8:15 am
I only have a 6 inch spring form pan. Can I increase the cooking time rather than scaling back the recipe?
Van
March 29, 2018 at 9:14 am
Hi Susie, many people have just added 5 minutes to the cooking time with a 6 inch pan with great success, so it would be 50 Minutes High Pressure and 20 minutes Natural Pressure Release. Hope you enjoy the cheesecake!
Brynn
March 31, 2018 at 4:08 pm
I just made this for Easter! I’m hoping it turns out… This is my first cheesecake E V E R and I am not sure what it should look like. It was slightly darker on the sides but still had some jiggle to it in the center. I am hoping that the cooling time and 12 hours in the refrigerator will firm it up. Fingers crossed!!!
Van
April 1, 2018 at 2:59 pm
Hi Brynn, it sounds perfect, there should be a slight jiggle in the middle when you take it out of the Instant Pot, it will set up great in the refrigerator.
Joyce
April 17, 2018 at 10:34 pm
I just made this for a potluck tomorrow. It’s will stay in the pan for 10 hours. Can a put it in the freezer for a half then serve it. By the way it’s looks great, and smells yummy. Thanks
Van
April 18, 2018 at 8:03 am
Hi Joyce, the freezer step is just optional,it helps release the pan cleaner, but you could serve it directly from the refrigerator. I hope everyone enjoys it!
Jen
April 30, 2018 at 12:50 pm
This cheesecake really is delicious, thanks for sharing!
Can you share the version that cooks in the oven rather than the instant pot?
I’m also wondering if you can adapt to make this in a larger (9 or 10 inch) spring form?
Barbara
September 26, 2018 at 5:17 pm
Is there a way to print out the recipe. It looks so delicious! Thanks!
Van
September 26, 2018 at 5:25 pm
Thank you Barbara! The print function works fine on my browser. If you’re using Chrome, try a different browser or try using File > Print.
Theresa
October 2, 2018 at 8:59 am
Hi! I have an 8 x 3 pan. How should I increase the recipe?
Van
October 2, 2018 at 9:02 am
Hi Theresa, you could probably increase it by a third, but the timing will be different and I haven’t tested it out yet. I would guess you have to add a few minutes of cooking time. The recipe and timing is designed for a 7 inch pan.
Tresemme
October 10, 2018 at 5:29 pm
I know this is an Instant Pot recipe and I own 2….but if I was to make this in a regular oven, do you know what temp and how long it would be?
Van
October 11, 2018 at 4:12 am
Hi Tresemme, I usually make a bigger version for the oven, but you could try 350F for 30 minutes, then check every 5 mins, the center should still be slightly jiggly when it’s done.
Sandra
December 29, 2018 at 7:47 pm
I followed the directions to a tee and when I took it out of the instant pot and uncovered it, it was only half cooked. I am finishing it up in the oven in a cast iron skillet with a water bath but I don’t know what went wrong. Any ideas? I have a 6 qt. Instant Pot and have always had great success with Everything I have tried.
Van
December 30, 2018 at 2:01 am
Hi Sandra, what material was the pan that you used & was it cooked using High Pressure?
Eman
September 11, 2019 at 6:09 pm
Thank you. This was perfect! I have tried several IP cheesecakes, but yours is my favorite. Thank you for sharing.
Van
September 11, 2019 at 7:14 pm
Thank you for trying it, so glad you enjoyed it Eman 😀
JenG
November 26, 2019 at 3:25 pm
My mother in law made this – it was amazing! Best cheesecake I’ve had.
Can you please share the recipe for the traditional size oven version (ie 9 or 10 in spring form)? I don’t own an instant pot – and want to make this tomorrow for Thanksgiving. Help!
Van
November 26, 2019 at 8:55 pm
Hi Jen, I’m so happy you loved it. You can double the recipe if you’re using a 9 or 10 inch pan. Pre-heat your oven to 350F. Put a large baking dish that can fit your springform into the oven & pour in about an inch of boiling water. Cover the bottom with foil, but you don’t need to cover the top & place into the water bath. Cook the cheesecake for 50-60 mins – the very center should be slight jiggly when it’s done. Good luck & Happy Thanksgiving!
JENG
November 27, 2019 at 7:30 am
Thanks a million, can’t wait to share it! Happy Thanksgiving!
Patti K
December 5, 2019 at 8:31 pm
Hi Van~ I recently made your “EASY Instant Pot Vanilla Cheesecake Recipe (7 Ingredients)” cheesecake and loved it! Now I want to make NY Style Cheesecake and wanted to check your cooking time vs other recipes (such as NY Cheesecake #17 or Rootitoot’s Cheesecake). Your recipe calls for Manual 45 mins where other cheesecake recipes calls for Manual 26 mins or 28 mins for dense. I am no expert and afraid that 45 mins would be too long?? Do you have any insight why others would cook in less time?? Any insight would be appreciated!! TIA!
Van
December 5, 2019 at 8:55 pm
Hi Patti, thanks for trying out my recipes! The different cooking times might stem from other recipes not using foil to wrap the pan? Uncovered cheesecakes will cook faster in the Instant Pot, but they usually look lumpy and uneven.
Patti K
December 6, 2019 at 11:34 am
That totally makes sense, I do like covering them in foils (& paper towel) to avoid condensation. Thanks for your quick response!!
Sharon
January 14, 2022 at 4:28 am
I’ve been making this cheesecake recipe since 2018, always to rave reviews. Now I want to branch out and use your recipe in small glass canning jars for mini desserts. Any suggestions on time? I’m thinking 7 minutes?
Van
January 14, 2022 at 6:13 am
I’m so happy to hear that Sharon! Either cover the jars with foil or gently seal the lids (not all the way) and cook 6 minutes High Pressure + 15 minutes natural pressure release. Let me know how it turns out