The BEST Instant Pot Pumpkin Cheesecake Recipe

November 23, 2019Van
Blog post

Prep time: 20 minutes

Cook time: 48 minutes

Serves: 6

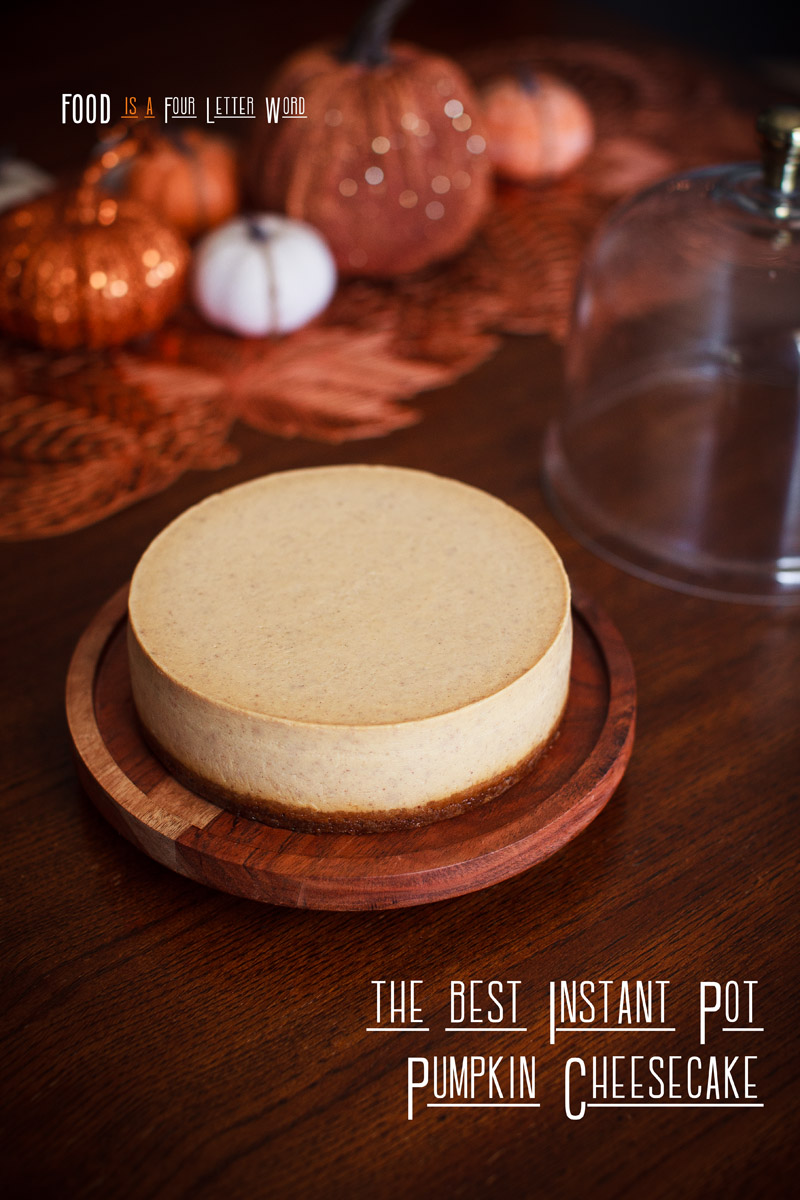
My entire family looks forward to Thanksgiving. Each year I begin prepping our menu with ease, concentrating on the proven classics. Theres just one particular dish were in vast disagreement on…and that dish is…Pumpkin Pie. I love pumpkin bread, pumpkin cupcakes, pumpkin cookies, pumpkin ice cream… but Pumpkin Pie holds the record for being one of the very few pumpkin flavored items I DON’T enjoy. My husband on the other hand loves that darned pie! This year I had to innovate a happy compromise…lets combine my love of cheesecake with American Tradition. Voila! Pumpkin Cheesecake a la Van was born.

Don’t be one of those sorry saps I see lugging a 50” Costco Pumpkin Pie out of the parking lot. Make your guests remember this blessed holiday of gluttony with this tantalizing take on the perennial favorite.

If you’re hesitant, listen to this. My stubborn husband just proclaimed this the best dessert he’s had in YEARS. Traditionalists beware—after making my version of Pumpkin Cheesecake…you just may be a convert.

The_Best_Instant_Pot_Pumpkin_Cheesecake_Recipe_title

I used Triple Ginger Snaps from Trader Joe’s to make the crust.
The_Best_Instant_Pot_Pumpkin_Cheesecake_Recipe_title

This silicone sling makes is very easy to lift out the cheesecake pan (purchase here).
The_Best_Instant_Pot_Pumpkin_Cheesecake_Recipe_title

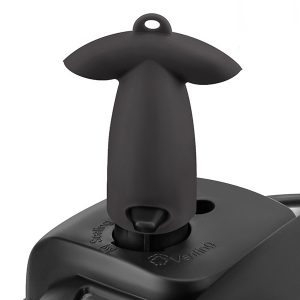
If you use your Instant Pot on the counter under your cabinets, this is an awesome accessory that diverts the steam downward and away from your cabinets (purchase here)

The BEST Instant Pot Pumpkin Cheesecake Recipe

The BEST Instant Pot Pumpkin Cheesecake Recipe

The BEST Instant Pot Pumpkin Cheesecake Recipe

The BEST Instant Pot Pumpkin Cheesecake Recipe

Be sure to click on the accessories list below to get the most out of your Instant Pot.
Best Instant Pot Accessories List

Print Recipe

The BEST Instant Pot Pumpkin Cheesecake Recipe

  • Prep time: 20 minutes
  • Cook time: 48 minutes
  • Serves: 6

www.foodisafourletterword.com

Ingredients

  • 12 oz Cream Cheese, (1½ Blocks)
  • 1 Cup Pumpkin Purée
  • 14 oz Can SWEETENED Condensed Milk
  • 2 Tablespoons Corn Starch
  • 1½ Teaspoons Pumpkin Pie Spice
  • 2 Large Eggs

CRUST

  • 1 Cup Ginger Snap Crumbs or Graham Cracker Crumbs (150g)
  • 2 Tablespoons Granulated Sugar
  • 2 Tablespoons Salted Butter, melted

*EQUIPMENT

Method

  • 1)

    Fill a large bowl with hot tap water from your sink, place the 2 Large Eggs into the bowl and set aside. Cut the cream cheese into small blocks, place it into a microwave safe bowl. Heat the cream cheese for 15 seconds, take it out, give it a stir than microwave for another 10 seconds then stir and check again – continue with 10 second increments until it’s very soft.

  • 2)

    Add the 14 oz can of Sweetened Condensed Milk to the bowl of cream cheese. Stir with a whisk until it’s smooth and there are no lumps. Add 1 Cup Pumpkin Purée, 2 Tablespoons Corn Starch, 1½ Teaspoons Pumpkin Pie Spice and 2 Large Eggs. Stir well with a whisk until the eggs are completely incorporated and the batter is smooth. Don’t whisk vigorously, just keep stirring until the batter looks homogeneous

  • 3)

    Trace the bottom of your 7 inch pan on parchment paper and cut out the circle to line the bottom of the pan.  Use butter to grease the the interior side of the pan very well. Add 1 Cup of Ginger Snap Crumbs, 2 Tablespoons of Granulated Sugar and 2 Tablespoons of melted Salted Butter into a bowl and mix well. Pour the crumbs into your springform pan and press firmly onto the bottom, you can use a spoon or something with a flat bottom like a small ramekin to help even out the crust.

  • 4)

    Pour the batter into your cheesecake pan. Pick up the pan and tap it a few times on the counter to even out the batter and this also helps pop air bubbles in your batter. Place a paper towel on top of the pan, it should not touch the cheesecake. Place one piece of foil on top and seal tightly,  then another piece of foil the bottom that wraps up towards the top ~ the entire pan should be covered ~ this helps prevent steam getting on your cheesecake. The cooking time for this recipe is also designed for this wrapping technique (your cheesecake could turn out overcooked if you’re not wrapping the top and bottom)

  • 5)

    Place 1½ Cups of water into the Instant Pot and place the trivet into it. Carefully place the the cheesecake pan on top of the trivet or use a Silicone Sling for easy lifting (purchase here). If you have a separate sealing ring you use for desserts, place that one on the lid.  Seal the lid and switch the knob to “Sealing”.   Set the Instant Pot for High Pressure / Manual for 48 minutes. Once the timer is up and you hear the beep, wait an additional 20 minutes while the pot releases the pressure naturally.  If the pin hasn’t dropped on it’s own after 20 minutes, switch the knob to “Venting” and when the pin drops open your lid.

    ***Different Instant Pot models, living in higher elevation or even different springform pans may change the cook time. If there is no jiggle in the very center, the cheesecake is most likely overcooked (overcooked cheesecakes are eggy and grainy instead of creamy), use 5-10 minutes less cooking time next time. If your cheesecake looks like liquid in the middle, it’s under cooked. Make sure there’s still 1½ Cups of water in the pot, recover the pan and cook for another 5 mins on High Pressure and 5 minute natural pressure release (repeat if necessary).

  • 6)

    Carefully remove the cheesecake from the Instant Pot. Unwrap the foil, the pan will still be hot so use mitts or kitchen tongs. The cheesecake should be solid and the very center should be a little jiggly.  Leave it on the counter to cool for about 1.5 hours. Cover the pan and place it into the refrigerator for at least 12 hours before serving.  Keep the cheesecake in the baking pan, you don’t want to remove the cheesecake until it’s been cooled. Serve with whipped cream (homemade recipe here) Enjoy!

↓ Supplies to make this recipe ↓


Leave a comment

Your email address will not be published. Required fields are marked *

Previous Recipe Next Recipe